
Science fairs are a great time to get your hands dirty, sometimes literally. Students who love dinosaurs may want to find a paleontology science project.
Paleontologists have to be creative with how they plan and perform experiments. Since the subjects of their research are often no longer alive, they often create models, utilize modern analogs, or study their subjects indirectly.
Most kids find science more engaging when they can incorporate topics that they find interesting. Many children love dinosaurs and want to find a dinosaur-themed science project to incorporate this passion.
Creativity and resourcefulness are key traits in paleontology! Since it can be quite difficult to get your hands on a good selection of real fossils for a science fair project, We provide a few paleontology science projects that you can do easily and cheaply at home.
Casting and Molding Experiment
Difficulty: Easy
Cost: $10 – $20
Details:
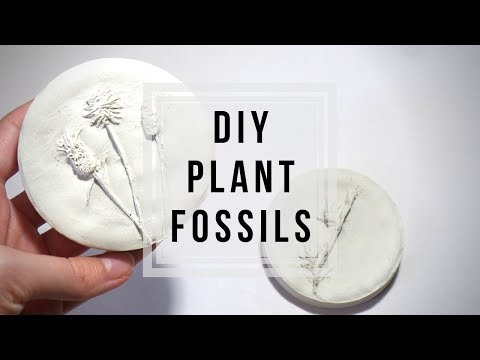
In this project, you will experiment with what types of sediment make the best molds for fossils. Many fossils are molds or casts of ancient animals, such as bones or shells.
By attempting to create molds with different sediments and then creating casts from those molds, you will better understand the process and conditions under which cast and mold fossils are created.
You can visit the Sciencing website for more on fossilization. Below we have a video demonstrating this project’s concept.
Materials:
- A “fossil” such as a chicken bone, seashell, or dinosaur toy that will leave a recognizable imprint
- A variety of sediments including sand, dirt from your yard, potting soil, and clay
- A small shovel or trowel
- Paper towels
- Water
- Small trays, tubs, or dishes for holding sediment
- Disposable cups
- Popsicle sticks
- Permanent marker
- Plaster of Paris such as this Dap 10310 Plaster of Paris from Amazon

Procedures:
Gather your sediments: Sediments can be any type of dirt, sand, mud, or clay. You can gather sediments easily by digging outside.
Don’t worry if sticks, stones, or leaves are mixed in with your sediment, they can be useful to the experiment. You can create additional sediments by adding water to moisten them, mixing in the sand, and using modeling clay as sediment.
Prepare trays or tubs: Sediments should be placed into individually labeled trays or tubs.
Hypothesize: This is a good time for you to hypothesize which sediments you think will create a good impression when something is pressed into it and which won’t. Be sure to record these ideas and provide your reasoning for each.
Press your fossil into your sediment: Your fossil can be anything that leaves a recognizable imprint. Seashells, chicken bones, and dinosaur toys are good examples.
Make sure to press the fossil firmly into the sediment such that an impression is left behind. These impressions will act as the molds for the casts you will be making next. If you added water to make any of your sediments moist, allow them to dry some before pouring the plaster.
Prepare your plaster: Follow the instructions on your bag of plaster to prepare enough to cover the impression in each of your sediments. Disposable cups and Popsicle sticks are good for this. Generally, this step involves mixing a 2:1 ratio of plaster to water until it reaches a milkshake-like consistency.
Pour your plaster over the impressions: Cover the entire impression in each of your tubs, including a small area around each impression.
Wait until the plaster has dried: Refer to the packaging of your plaster for the drying time. You may see excess water collect on top of the plaster. This can be removed by carefully dabbing it with a paper towel.
Remove the plaster casts from the sediment molds: These casts should be labeled with a marker or otherwise assigned a name so that they are not mixed up. You may want to lightly brush off any sediment stuck to the casts.
Study the casts to see which sediment produces a more accurate mold: You should rank the casts by how much they resemble the original fossil. These can be ranked from best to worst. You may use a scale of 1-10 or whatever other criteria you think works best.
Discussion:
Once the fossil casts have been scored, compare the hypothesized results with the actual results. Some thoughts to consider include:
- Which kinds of sediments created better molds?
- Did leaves or sticks get stuck in the cast?
- Did moist sediments produce different results than their dry counterparts?
- Why do you think you saw these results?
Taphonomy Experiment
Difficulty: Easy to Moderate
Cost: $10 – $20
Details:
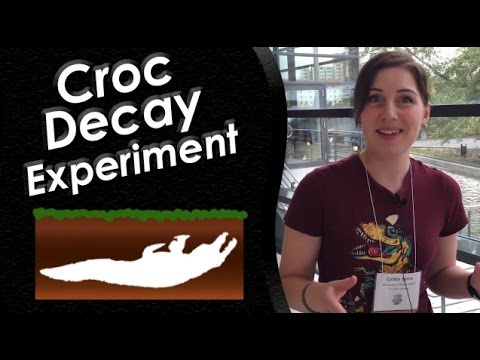
In this project, you will experiment with how various taphonomic processes affect animal remains before fossilization. Taphonomy is essentially the study of everything that happens to an organism between when it died and the present.
These effects include rotting and decay, bones being broken or chewed, being buried, and even damage done to bones during excavation. You can learn more about taphonomy at greatarcheology.com or through the following video explaining the taphonomy experiments used in paleontology.
I’ve provided a pair of experiments that are easy to implement and showcase some of the effects that the environment can have on bones before they are fossilized. We will begin with the basic experiment.
Materials:
- At least four pieces of bone-in chicken, raw or cooked (legs work especially well)
- A plastic container with a lid
- Soap
- Two cups
- Water
- Vinegar
- An oven
- Baking sheet
- Paper towels
Procedures:
Preparing controls: Several controls are required for this experiment. Begin by removing a pair of bones from your chicken meat and cleaning them gently with soap and water.
Next, place one bone into a labeled plastic container with a lid and the other into a labeled cup of water. These will act as controls for bones that are exposed to clean, room temperature conditions and cover both dry and wet environments.
Preparing experimental samples: Pour vinegar into a cup, label it, and set aside. Preheat your oven to 250 degrees Fahrenheit (120 degrees Celsius) then take out your baking sheet and set it aside.
Hypothesize: This is a good time to hypothesize about what effects acidic vinegar and dry heat may have on bones.
The acid from the vinegar simulates the effects of acidic soil that a bone might be buried under during fossilization. The heat from the oven simulates the effects of leaving a bone out in the sun over a long duration.
Acid Experimentation: Remove a bone from the meat and clean it as before. Place this bone into your prepared cup of vinegar. Allow both of your bones in cups, one water, and one vinegar, to sit for 24-48 hours.
After the 24-48 hours have passed, remove each bone and dry them; place them onto labeled paper towels to dry.
Heat Experimentation: Remove a bone from the meat and clean it as before. Place this bone onto your baking sheet and place it in the oven. Allow the bone to bake for about 3 hours.
After this time has passed, remove your baking sheet from the oven and allow the bone and tray to dry for about 15 minutes.
Results: Compare each of your four bones. Record visual and physical differences. Do you notice any differences in strength or flexibility? Test how each feels when you try to bend them. Record your findings.
Discussion:
Use the data gathered by your experiment to draw conclusions. Think about the answers to the following questions:
- How did your observation compare to your hypotheses?
- Did bones change appearance?
- Did they become stronger or weaker? In what ways?
- How do your experimental bones compare to your controls?
- For bones to become fossils, they must survive for many years and maintain their shape even under great pressure. How might these conditions have affected the bone’s ability to survive?
Advanced Taphonomy Experiment
Difficulty: Moderate to Advanced
Cost: $20 – $40
Similar to the last experiment, we will use bones to explore taphonomy. This project is designed for more advanced students and tackles more variables.
This is where you decide which avenues to research. You can try just a few or all of these methods and get useful data. You must understand the previous experiment’s methodology first. Now we can begin the advanced experiment.
Materials:
- An outdoor area for the experiment to take place
- Water
- A shovel
- Soil
- Sand
- Clay
- Plaster of Paris such as this Dap 10310 Plaster of Paris from Amazon
- Salt
- Food scraps
Safety Materials:
- Gloves
- Goggles
- Face Mask
Advanced Procedures:
Prepare controls: Keep any controls from the previous taphonomy experiment. If you choose to do any experimentation with meat still on the bone, be sure to prepare additional controls with the meat still attached. If you choose to do any experimentation outside, you may need to prepare controls that account for regular outside conditions.
Hypothesize: Before you can begin your experiments, you must hypothesize on what the results of each might be and why. Good scientists do not blindly experiment. You must have a hypothesis behind each of your actions.
Deciding on additional experimentation: This is a great time to be creative! If you can think of something to do to the bones, there is a chance it has happened to a bone in the past. Decide on several additional experimental conditions for your bones.
I’ve provided some suggestions to get you started:
- Leave bones outside for about two weeks to see how the sun, rain, wind, and wildlife affect the bone.
- Bury the bone to see if the bone that is quickly buried will affect the taphonomy short term.
- Further, bury the bone in a variety of sediments to observe differences between soil, sand, or even plaster of Paris.
- Leave the meat on the bone to see if it affects any of the previously mentioned experiments.
- Test if other food scraps, such as old fruits, vegetables, bacon grease, etc. affect the bone.
- Think of other chemicals or compounds that can be applied to a bone that might mimic outside conditions, just as we used vinegar to replicate acidic soil over time.
Identify limitations in the experiment: Understand that meat can take up to two weeks to fully rot or dry out and that fossilization takes millennia.
- The experiment allows you to learn what affects rot, decay, and exposure has to bones in two weeks. You will not see any effect of fossilization in your lifetime without lab conditions.
- You may want to consider covering some of these experiments or placing them farther away from living spaces to avoid a potentially nasty rotting smell.
- If you do work with any food, make sure that you wear gloves, goggles, and a face mask while handling them. Rotting foods can be harmful and precautions must be taken anytime that you might be interacting with them.
Execute your experiments: Once you’ve decided on your experiments, prepare to execute them. Be sure to label each of your experiments and controls so that they aren’t mixed up.
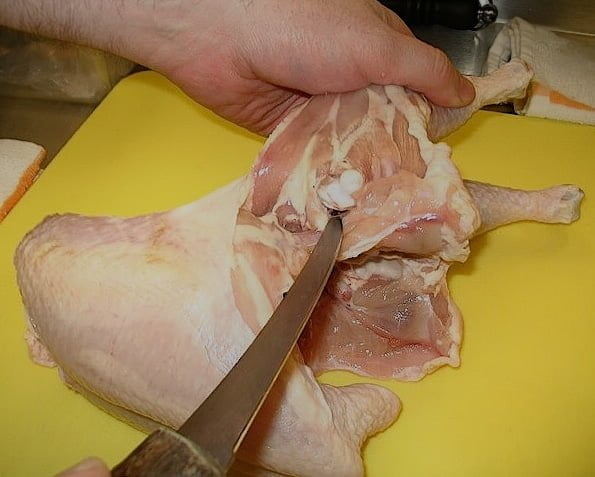
Make Observations: For your experiments that can be observed (buried experiments cannot be observed without removing them from the experiment) make regular observations about them.
Note any changes in appearance, smell, and structural integrity. If you left any bones inside of the meat, consider using a small knife to cut away the exterior meat to observe the bones directly.
Discussion:
At the end of the advanced experiments, you may end up with a more complete understanding of barriers to fossilization. Try to answer some of the following questions in your report:
- How did your observations compare to your hypotheses?
- How did your experimental bones compare to your controls?
- If you prepared additional controls, how did they compare to each other?
- Did any of your results particularly surprise you?
- How might any of these conditions affect a bone’s ability to persist long enough to become fossilized?
Plaster Jacket Experiment
Difficulty: Moderate to Difficult
Cost: $20 – $50
Details:
In this project, you will create a model of a plaster jacket and experiment with how different materials and techniques affect the strength/usefulness of your jacket.
Plaster jackets are what paleontologists use in the field when excavating fossils to ensure that they can be safely removed from the ground and transported to a laboratory. Paleontologists can encounter a wide variety of conditions in the field, and they must be able to adapt on the fly.
While I rate this experiment as moderate to difficult, creating a plaster jacket without experimentation can be an easy and fun activity for younger learners as well.
There is a resource on Dave Hone’s Archosaur Musings website that covers creating plaster jackets. Watch the short video below to see an example of this process.

Materials:
- Plaster of Paris such as Dap 10310 Plaster of Paris from Amazon
- Water
- A fossil, which could be something such as a seashell, chicken bone, or eggshell
- Heavy-duty scissors or garden shears
- Sand or dirt
- Trash bags
- Small tubs for creating your fossil matrix
- A permanent marker
- Goggles and a face mask to protect you from airborne plaster dust
- Inexpensive burlap such as this burlap on Amazon

Optional Materials:
- A paintbrush
- A scale
- Additional tub shapes and sizes
- Popsicle sticks or wooden skewers
- Aluminum foil
- Toilet paper
- A water substitute such as juice, soda, or milk
- A small chisel and hammer
- Clay such as this Sargent Art Plastilina Modeling Clay from Amazon

Procedures:
Learn how to create a plaster jacket: Before you can begin to experiment with plaster jacket creation.
Prepare your fossil matrix tub: When a fossil is excavated in the field, it is usually encased in some type of matrix (the material in which fossils are found, typically sedimentary rock). Many fossils must be excavated from stone, so you will be simulating this using plaster of Paris.
You will begin by lining one of your small tubs with a portion of a cut trash bag. This will help to keep the plaster of Paris from getting stuck in your tub.
Before you begin making your plaster, add some sand or dirt to your tub. This will mix with your plaster giving it a more realistic look and feel. It will also help you to differentiate your fossil matrix from your plaster jacket.
Preparing your fossil matrix: Next, add your plaster and water to the tub as per the instructions on your plaster package and prepare the plaster. You want to make enough plaster to fill most of your tub.
Once the plaster is prepared, place your fossil in the plaster such that a portion of it is exposed, but most remains concealed in the plaster. After your plaster has set, remove it from the tub and allow it to dry for another 24 hours.
Prepare an area for creating your plaster jacket: To create a plaster jacket, you first have to prepare your burlap strips, plaster, and an area to work.
For a workspace, you’ll want to set out a cut-open trash bag, as making a plaster jacket can be quite messy. You’ll also want to have your fossil matrix, burlap strips (discussed in the next step), and a tub for your plaster set out in your workspace.
Preparing burlap strips: Using your heavy scissors, cut your burlap into strips that are about 1 inch (2.5 centimeters) by 4-6 inches (10-15 centimeters) depending on the size of your fossil matrix.
The strips should be long enough to wrap most of the way around the thickest part of your matrix, but not so long that they wrap around it more than once. Do not cut all of your burlap yet, as you may want to experiment with the size of your burlap strips later.
That said, you will still need to prepare enough burlap strips to cover your fossil with at least three layers. Your plaster will set fairly quickly and you will not have time to cut additional strips once you have prepared your plaster.
Preparing plaster: Again, you will want to put a portion of the cut trash bag into a tub to keep the plaster from sticking to it. Plaster can be difficult to remove once it has set. Be sure to read the upcoming steps before proceeding.
Once you have begun preparing your plaster, you will be on a time limit. Prepare your plaster following your package’s instructions.
Putting together your plaster jacket: Before applying your plaster strips, you should cover your matrix in a layer of cut trash bag such that any exposed surface is covered. You do not need to wrap the bottom.
One at a time, you will dip each of your burlap strips into the plaster and apply them to your bag-covered fossil matrix. You do not need to apply strips to the bottom of your matrix.
Make sure to smooth out your plaster strips as you apply them to avoid air bubbles and sharp spines from the dried plaster. Your plaster strips should be applied in three perpendicular layers, meaning that they should alternate directions. Be sure to spend extra time smoothing out your last layer of plaster to avoid sharp spines of dried plaster.
Your completed jacket: Once your plaster has set, allow it to dry for an additional 24 hours. Your first plaster jacket is now complete! This jacket will act as your basic control jacket for your experiments.
Take some time to make notes about your handiwork and be sure to record your observations and label your jacket before proceeding. Record answers for the following questions:
- How strong is your jacket?
- Is the plaster flaky, or smooth?
- Does it have sharp points?
- How easy is it to remove from the fossil matrix (use your heavy scissors or saw to cut it open)?
- How much weight does your jacket add to the fossil?
- Does your jacket do a good job of protecting your fossil from damage?
Hypothesize: Now that you have made a basic plaster jacket, hypothesize what you could do to improve your plaster jacket and also about what traits made your basic jacket effective. You may want to plan strategies for quantifying the effectiveness of your techniques.
For instance, when testing for strength, is there a way you can test specific amounts of force they can take before breaking? Remember that a good scientist will not blindly experiment. You must have some kind of reasoning behind each of your experiments.
I’ve provided a few thoughts to get you started:
- Would a different ratio of water to plaster improve your jacket’s strength?
- Can other liquids substitute for water? I’ve heard tales of paleontologists using sports drinks when they are short on water.
- What might you change about the size and shape of your burlap strips? What about the number of layers? The pattern of application? Some fossils weigh hundreds or thousands of pounds, so a light yet strong jacket can be immensely valuable in moving a fossil.
- If you have a particularly long or oddly shaped fossil, do you need to adjust the jacket in any way? You can place several fossils in a tray to simulate a long fossil and use a hammer and chisel to carve shapes into your matrix. Some add poles to add strength to long bones or pad a matrix with additional wrapping (your trash bag) to provide support under arches or protrusions.
- Do different wrappers work better than others? In addition to trash bags, paleontologists use aluminum foil, wet toilet paper applied with a paintbrush, and sometimes no wrapper at all.
- Sometimes, fossils are found in matrixes that are fairly wet, such as clay. In these situations, the matrix drying out could cause damage to the fossil. Are different techniques and wrappings more effective in retaining moisture?
- You can use clay (natural or modeling, though natural clay will be a better analog) in place of plaster of Paris when making your matrix to simulate wet matrixes. In this situation, wrapping the bottom of your matrix would be appropriate.
- If you are feeling particularly adventurous, you could experiment with substitutes for plaster of Paris and burlap. Keep in mind that the plaster of Paris and burlap are both inexpensive and cheap and these are major factors for their continued use.
Execute your experiments: When preparing your plaster jackets for experimentation, remember that you do not necessarily need to create a new fossil matrix for each experiment.
If your control matrix is undamaged and fits into your experiment, it can be reused. Be sure to test your jackets for a variety of variables such as strength and weight. Record your observations and label each jacket.
Discussion:
Plaster jackets come in a variety of forms and take many attempts to perfect. Even in the field, it may come down to trial and error. Consider the results of your project:
- How did your experiments compare to your hypotheses and your control?
- What techniques and strategies worked and which didn’t?
- Altogether, what did you find would make the best plaster jacket?
- Remember that you are working on a small scale. Would the strategies you tested work when scaled up to a matrix that weighed a hundred pounds? A thousand pounds?
- How might your plaster jackets fair against a variety of conditions and situations? Is it possible that some situations require a specialized jacket, but that specialization might be detrimental in other situations?
- Is it possible for there to ever be a “perfect” plaster jacket design, or must they be adjusted on a case-by-case basis?
How to Implement Paleontology Science Projects
If you are particularly creative/clever, there is the potential that you have discovered an effective strategy that no one else has tried before. If you think you have made a novel discovery, research it!
You may contact your local natural history museum and discuss your findings with them. Many organizations appreciate the enthusiasm of students and will offer additional resources.
Science projects are a great way to provide a more engaging learning environment than reading a textbook. Some learners thrive in these settings where they struggle to learn from classroom lectures.
Picking a science project that covers a subject that the student loves can be a great way to cultivate an interest in scientific disciplines.
If you’d like to learn more about becoming a paleontologist, we have a full guide. You can further enhance the experience from these experiments by going fossil hunting.
Did you try any of these experiments? Leave us a comment to let us know how it goes or if you have further questions about the processes described. If you find this content useful, please share it with others.
i also have another question about the taphonomy experiment which for how long do i have to leave the bone in the plastic container with a lid?
As little as 1 day but 2 days would be preferred.
hello
im wondring about if the bones for the simple taphonomy experiment has to be chicken or can i use what ever bones i want like lamb or beef bones
Great question! Chicken bones were suggested because they’re actual dinosaurs and the first thing that came to mind. Bones of any sort can be used in their place with similar results.
thanks